Repacking Hubs: Difference between revisions
Scaffolding (talk | contribs) mNo edit summary |
(Undo revision 9084 by Scaffolding (talk)) |
||
| Line 1: | Line 1: | ||
== Tools == | |||
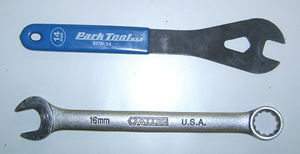
[[Image:AxleTools.jpg|thumb|Cone Wrench and Combination Wrench]] | |||
* [[Bench Vice]] | |||
* [[Axle Vice]] | |||
* [[Cone Wrench]] | |||
* [[Combination Wrench]] | |||
* [[Grease]] | |||
* [[Bearings]] | |||
* [[Ruler]] | |||
* Small [[Magnet]] | |||
1 | == Step 1: Wheel Removal == | ||
# Remove the Wheel | |||
# Remove the Nuts or the Skewer | |||
2 | == Step 2: Using the vice == | ||
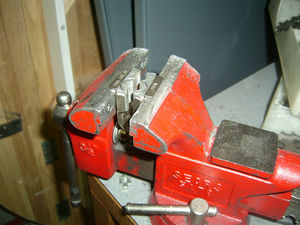
[[Image:SetupAxleVice1.jpg|thumb|Place the Axle Vice in the Bench Vice]] | |||
[[Image:SetupAxleVice2.jpg|thumb|Place the Axle Vice in the Bench Vice]] | |||
[[Image:ExplodedAxle.jpg|thumb|Axle parts from left to right: Axle, Cone, Lock Washer, Lock Nut]] | |||
[[Image:CleanHub.jpg|thumb|Clean out the old grease, check for pits.]] | |||
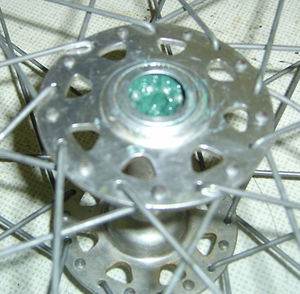
[[Image:GreaseHub.jpg|thumb|Put new [[grease]] in]] | |||
[[Image:InsertBearings.jpg|thumb|Insert new [[bearings]]]] | |||
[[Image:ReplaceDustCap.jpg|thumb|Replace the dust caps]] | |||
# Place the Axle Vice in the Bench Vice | |||
# Find appropriate cone wrenches for both cone and lock nut. | |||
# On a rear wheel break lose cone from lock nut on non-drive side. On a front wheel do which ever side. | |||
# Remove lock nut any washers or spacers and then cone nut. Keep parts in the order they where removed. | |||
# Slide axle out of hub. | |||
# Remove dustcaps if they will come out easily if not leave them in. | |||
# Remove bearings, [[magnets]] work great for this. Save on a clean rag. | |||
# Clean cups cones and bearings. This may require the aid of some degreaser if grease is old and hard. | |||
[[Category:How-to]] | |||
Latest revision as of 22:11, 11 January 2011
Tools
Step 1: Wheel Removal
- Remove the Wheel
- Remove the Nuts or the Skewer
Step 2: Using the vice

Put new grease in

Insert new bearings
- Place the Axle Vice in the Bench Vice
- Find appropriate cone wrenches for both cone and lock nut.
- On a rear wheel break lose cone from lock nut on non-drive side. On a front wheel do which ever side.
- Remove lock nut any washers or spacers and then cone nut. Keep parts in the order they where removed.
- Slide axle out of hub.
- Remove dustcaps if they will come out easily if not leave them in.
- Remove bearings, magnets work great for this. Save on a clean rag.
- Clean cups cones and bearings. This may require the aid of some degreaser if grease is old and hard.


